
Jib crane installation manual-gorbel style
Keyword:Jib crane Time:2020-11-3 9:00:13
Installation, Operation Manual
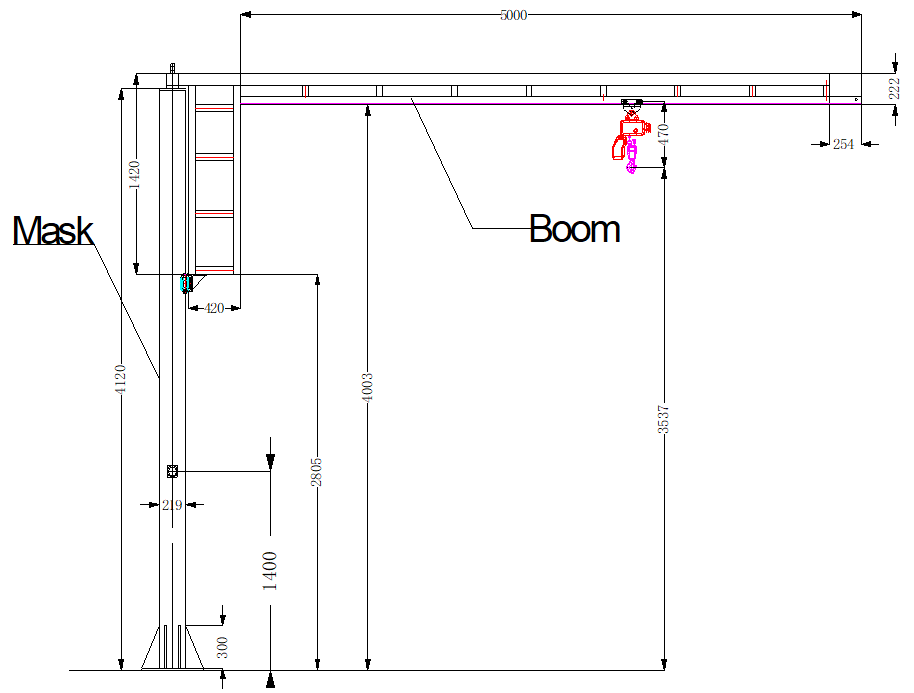
Normal safety precautious:
FChecking for obstruction in crane rotation
FChecking that all bolts are tight and have lockwashers
FMaking sure that the endstop is in place
FMaking sure that festooning can not be snagged and pinched
Step-1 Pre-assembly:
1. Read the manual before starting installation
2. Tools and materials typically needed to assembly crane
F Torque Wrench
FLadders/man lifts
FHand tools
FHeavy duty drill
FAllen wrench
FLeveling tools
FLifting device to lift heavy masts and booms
FMounting tools(M18*180mm-Grade 5)
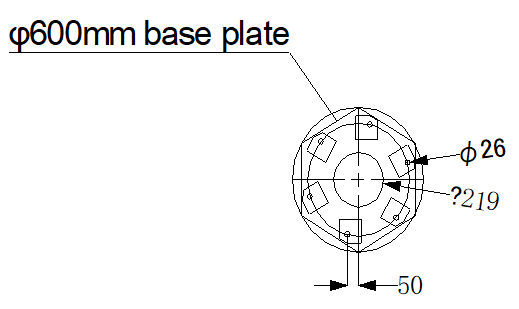
Installing Anchor bolts
A: For foundationless jibs( 6 bolts)
For jib cranes that can be mounted on a 6’’ foundation that is free of cracks, seams, explosion joints
Anchor bolts diameter must be 20mm  Note: A minimum 8’’ thick reinforced concrete floor is required
 Have minimum of two threads above nuts after installation
 Note: Jib crane foundation requirements are based on soil pressure of 0.12mpa, concrete pressure recommended for jib crane foundation is 23mpa of compressive force
 Foundationless jib cranes should be mounted on shallow foundations, centered on a square foot area that is free from cracks, seams or walls mounted with chemical anchor bolts to withstand a minimum 1700kg pulling out force
  Chemical anchor bolts are strongly recommended
B: Drill holes in concrete floor by using the pre-drilled holes in base plate as guide (the drill bit size is recommended by 22mm)
C: Install anchor bolts (Grade 5 or better) and hardware according to manufacturer’s direction or requirements
Installing and plumbing mast
A: Cover entire base plate area with 25mm of non-shrink precision grout.
B: Set mast into place and make sure that base plate is completely seated in the grout
C: Drop plumb line from top of mast, using fixture or equivalent
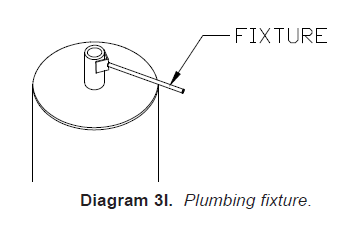
D: At the point “A”, 25mm below top mast plate, set plumb line a distance of 75mm from surface of mast pipe

E: at the point “B”, 100mm below point “A” (approximately where rollers will contact mast pipe), distance between plumb line and face of mast should be also 75mm
F: Repeat steps D and E at every 60 degree around the mast.
be sure to fasten plumb line securely to plumb fixture so that it won't move
G: once mast is plumb and grout has cured, fully fasten all anchor bolts by hardware
H: verify mast is still plumb
Boom installation
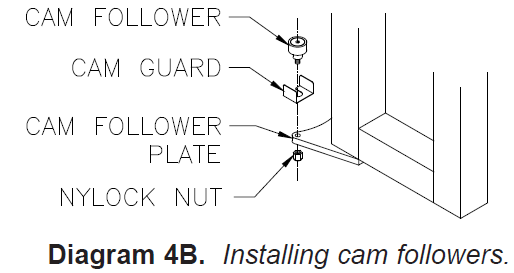
1. Install cam followers/trunnion rollers at bottom of boom assembly, tighten nylock nuts to 68N.m and hexnuts until lockwahser are flat.
Warning: if nylock nut is removed it must be replaced
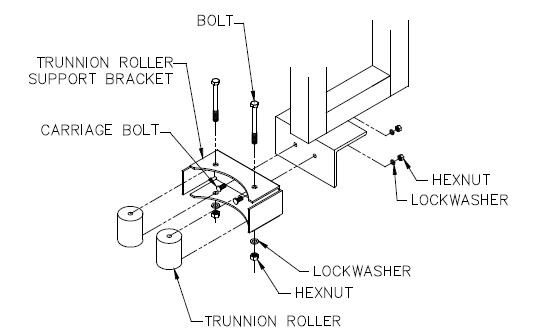
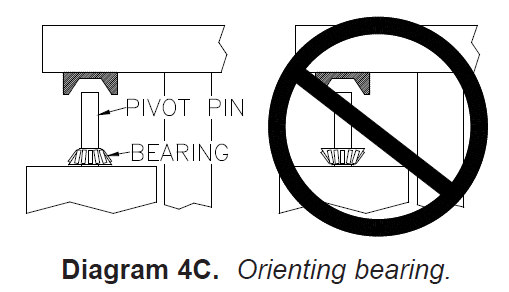
2. Place and orient pivot bearing on mast pivot pin
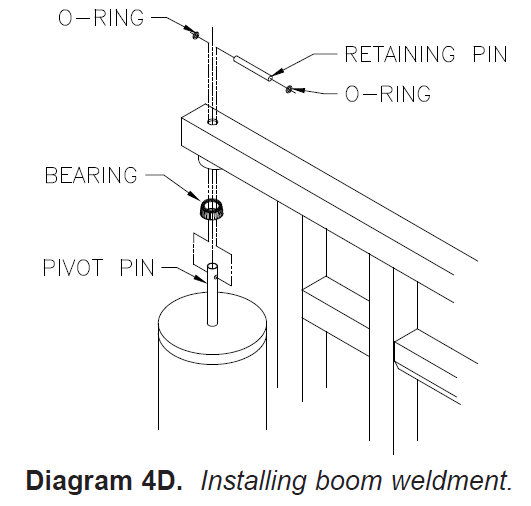
3. Place boom assembly over pivot pin on mast, insert retaining pin through pivot pin and roll O-rings onto retaining pin
4. Level boom by shimming between trunnion mounting assembly and trunnion support angle or by evenly adjusting eccentric cam followers with an Allen wrench, be sure boom is leveled to 1/640 of span above level
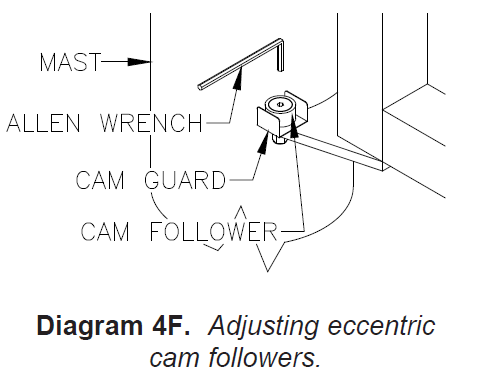
5. Check to make sure that both rollers have full face contact with mast pipe.
Carefully swing boom through entire travel to ensure boom is clear of obstructions and does not drift.
If boom s drifts, check to make sure that cam flowers/ trunnion rollers are evenly adjusted and/or mast is plumb.


